|
|
Post by madmorgan on Oct 26, 2016 11:10:27 GMT
Oh wow, where'd you find the figure with the signal flags?? BTW still looking for that officer figure we spoke of.
|
|
|
|
Post by boxholder on Oct 26, 2016 12:12:42 GMT
The trooper with the signal flags was in the US Command Post set that I got.
That said, it appears that there were two variations. The one that I got had a rickety wooden signal tower and a tent. The other appears to have had a wrecked building. I cannot say whether the signal man was in that second set.
|
|
|
|
Post by loyalist on Oct 26, 2016 13:03:14 GMT
The signal figure was in the both the KS US command set with the ruined building and in the retail command set with the large Renedra oval base and plastic tent. The 9 figures in each set were identical: 1 signalling figure, 5 infantry at attention, 1 kneeling radio or field telephone operator, 1 officer reading a document and 1 pointing figure wearing a long coat and helmet. The observation platform was in both sets.
I got 4 of the KS ruined building sets for extra figures to use in command squads and built 2 of them with the tower in different positions on the rubble pile and with different command team figures (Blue Moon British command figs on one). I have 2 surplus ruined buildings with their observation towers (but no figures). Like some of the KS ruins I've seen photos of, one is missing the brickwork above the window. The other has the complete window frame and bricks above it. Contact me if you want to buy them (cheap).
|
|
|
|
Post by madmorgan on Oct 26, 2016 13:31:55 GMT
Thank you for the offer - not sure atm. Of coarse, the command squad, my bad.
|
|
|
|
Post by loyalist on Oct 27, 2016 0:53:58 GMT
I started work on the spotting top this evening. Used a tube cutter to take 3/4" off the length of the outer 3/8" diameter brass tube that's the main tripod leg. Now I've got a length of 9/32" tube sleeved inside showing and a step in the tripod leg. The 9/32" tubing will insert into a hole drilled in the spotting top and the top and its styrene platform will sit on the step. The spotting top will be about 1/4" higher than if it was mounted on the metal girders than came with the kit. The idea is that with the taller mast and shorter funnel there would be less smoke interference at spotting top level. (I like to have a concept behind modifications to models but in this case I thought the funnel looked far too big for the model - nothing could be done about the funnel diameter so I shortened it by 3/4".)
I hope to finish the spotting top within a week, then install 1/8" x 1/4" magnets in the 5" turrets and their mounts. That should complete the modifications, then on to detail painting.
|
|
|
|
Post by David N.Tanner 07011959 on Oct 27, 2016 14:52:01 GMT
can't wait to see the finished project.
|
|
|
|
Post by madmorgan on Oct 28, 2016 10:56:46 GMT
ditto!
|
|
|
|
Post by loyalist on Nov 9, 2016 2:14:56 GMT
After a week of doing little hobby-wise but paint S2G tanks, Flivvers and Conqueror trucks I'm back at work on the Land Ironclad. The Conqueror searchlights are being painted and the catwalk structure dry-brushed. The spotting top height is about 1/8" higher than stock; it's sitting on the vertical main tripod leg which inserts into a 9/32" hole drilled into the bottom of the spotting top. Height is set by the outermost 3/8" diameter brass tube.
I'm modifying the spotting top design. About 20% of the top hatch was miscast/missing so it was removed by very careful filing and wet sanding. Armoured doors similar to those on my scratch-built bunker command towers, but with portholes, were added to port and starboard on the rear wall. Why two doors? This allowed me to eliminate two other miscast areas in the horizontal ridges across the base of the rear wall. One door will have 'WC' decals on it - the crew in the spotting top have a washroom (or 'watercloset' if you're British) so they don't have to travel to one on a lower deck via the ladder inside the main tripod leg. I may add some related pipes gong down a tripod leg. :>)
The round ridges around the roof HMG positions were filed and sanded smooth. The HMG holes are being filled with gelcoat tonight and will be filed and sanded flush tomorrow evening. A new roof hatch will be positioned over one of the filled holes and a ship's siren over the other. I'll probably add a radio antenna and a railing around the roof made from model ship stanchions 1/2" high and thin brass rod.
After several concept drawings of the platform around the spotting top I came up with the final design tonight. It'll be made of styrene like the platform around the superstructure. I hope to have the basic structure done by Thursday when I leave town to spend Remembrance Day and the weekend with my 96 year old dad. He's a veteran of the Canadian/American First Special Service Force - aka The Devil's Brigade.
|
|
|
|
Post by madmorgan on Nov 9, 2016 14:11:59 GMT
Wow a shout out to your Dad!! I'm sure you've had some wonderful tales to grow up on. A salute to a fellow veteran on Remembrance/Veterans Day.
|
|
|
|
Post by loyalist on Nov 9, 2016 15:25:04 GMT
Wow a shout out to your Dad!! I'm sure you've had some wonderful tales to grow up on. A salute to a fellow veteran on Remembrance/Veterans Day. Thanks Morgan. Dad and other FSSF vets I met at their formerly annual gatherings in the US and Canada said very little about their experiences overseas, other than the camaraderie. This weekend my brothers and I will be interviewing and recording Dad - he's decided to talk about his combat experiences, something he'd rarely mentioned and in little detail. Re the LI, the holes on the spotting top roof have been filled and I'm cutting out its platform this afternoon. The lower deck platform has been high-lighted and I'm painting the Conqueror searchlight lenses now. They'll be installed this afternoon; another pair has been ordered for the spotting top platform. |
|
|
|
Post by loyalist on Nov 17, 2016 13:20:15 GMT
After making the spotting top platform from 2mm thick styrene instead of the 1.5mm used on the lower deck platform (because it looked better with the bulk of the spotting top structure) the usual plate lines were scribed on it. After considerable rasping, filing and sanding to get the underside of the spotting top casting level the platform was glued to it with ca. The square plug on the underside protruded through the styrene so was filed and sanded level with it, which will lower the spotting type height to about 2mm above stock. The splinter screens are being added now and are exactly like the ones on the lower deck platform. The next step will be to add the triangular 'starfish' supports underneath the platform radiating from the main tripod leg in WWI Royal Navy style. When those and the rear tripod legs are done I'll post more photos.
|
|
|
|
Post by loyalist on Nov 26, 2016 12:40:43 GMT
Photos of the Land Ironclad's spotting top under construction: Underside view showing the six 2mm wide strips of styrene to which the triangular 'starfish' supports will be glued. They butt up against the 3/8" brass tube used as the main tripod leg. Marks from the rasp used to cut away the rectangular resin plug and make it level with the underside of the platform can be seen. 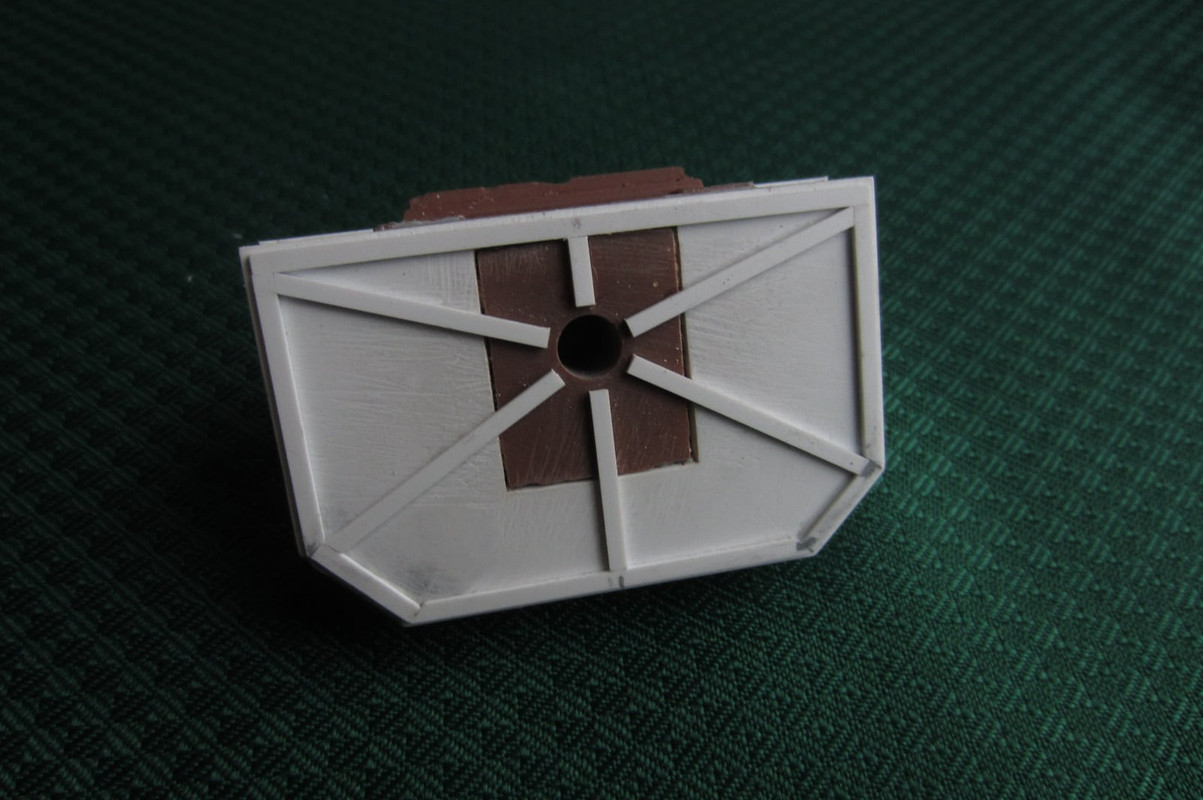 Front view. Divots in the visors over two windows need to be repaired with resin. The construction of the splinter screen around the platform was identical to that of the platform a deck lower. I decided to omit the pair of searchlight positions extending from each side of the platform; a mock-up showed the structure looked too wide with them. I might put a Conqueror Models searchlight on the roof with a splinter screen around it.  Rear view showing the HMG holes on the roof filled with white gelcoat and sanded, and the new hatch added to replace the partly molded one originally at the front of the roof, which was carefully filed and sanded off. Two rear doors were added in part to cover damaged/miscast sections of the horizontal ridges at the lower rear. One will be marked as a 'WC'. More details will be added to the roof including a Conqueror Models searchlight, a ship's siren, some vents and maybe a splinter screen just around the searchlight. 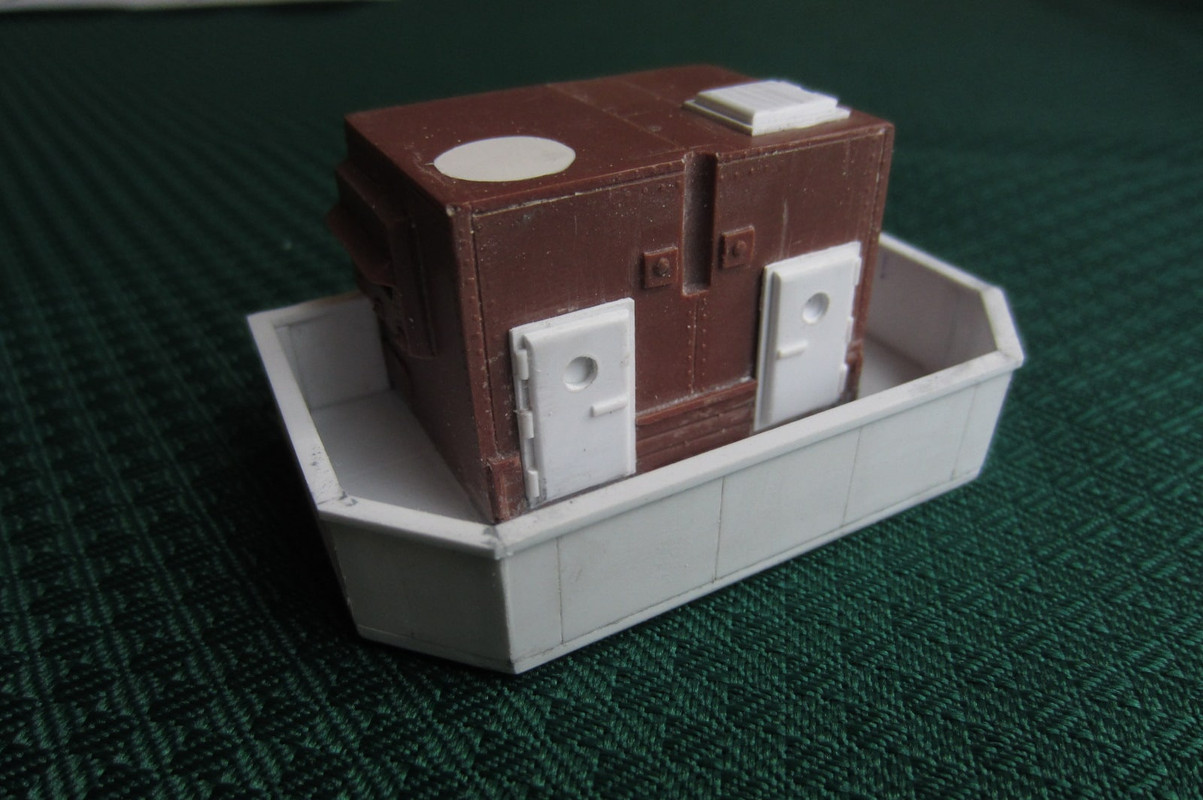 |
|
|
|
Post by Quendil on Nov 26, 2016 14:11:27 GMT
Your modelling skills are excellent. Its going to be one great model when you have finished
|
|
|
|
Post by digid on Nov 26, 2016 19:23:22 GMT
The castings look pretty bad to me, lots of bubbles and mold imperfections. Do you know if this was cast by Alien Dungeon or Iron Clad?
I have been working on getting enough built to get a few games in, this is on my want list though. But I have a few more tanks and tripods to build first.
I like where you are going with this model though, nice work!
|
|
|
|
Post by loyalist on Nov 27, 2016 17:11:44 GMT
The castings look pretty bad to me, lots of bubbles and mold imperfections. Do you know if this was cast by Alien Dungeon or Iron Clad? I have been working on getting enough built to get a few games in, this is on my want list though. But I have a few more tanks and tripods to build first. I like where you are going with this model though, nice work! Thanks! The castings were made by Alien Dungeon and some are not very good. I bought the Ironclad kit from a guy in western Canada who sold it and a large amount of kick starter material at bargain prices. The worst thing about the Ironclad castings was the 'hogged' main hull, which is a few millimeters higher in the middle than at the ends - enough to be noticeable but there's little to be done about it. The new styrene platform on the main superstructure will help draw attention away from that defect, as will the larger spotting top and its tripod legs. Some of the turrets are defective with bubbles at the bottom edge (which was the top while in the mold) and damage caused by over-sanding after removal from the molds. The 7" gun turret is the worst - I'm going to reduce its height by 4-5mm to remove the defective lower section. It looks overly tall compared to the 7" Monitor tank turret. |
|


